
Cart
Let's face it—blank walls are about as exciting as watching paint dry (which, ironically, is what most people do with them). But who says you need fancy art or a massive budget to transform your living room into a Pinterest-worthy space? Paper—yes, that stuff you've got stacked in your printer—is about to become your decoration BFF. With just a few folds, cuts, and maybe a touch of glue, you can create wall art that'll have your friends saying, "You MADE that?!" So grab your scissors and let's turn those sad walls into conversation starters that don't involve awkwardly commenting on the weather! If you're pairing your paper creations with accents like Artistic Wall Hangings for modern living room decoration with paper, the transformation will feel even more expressive and intentional.
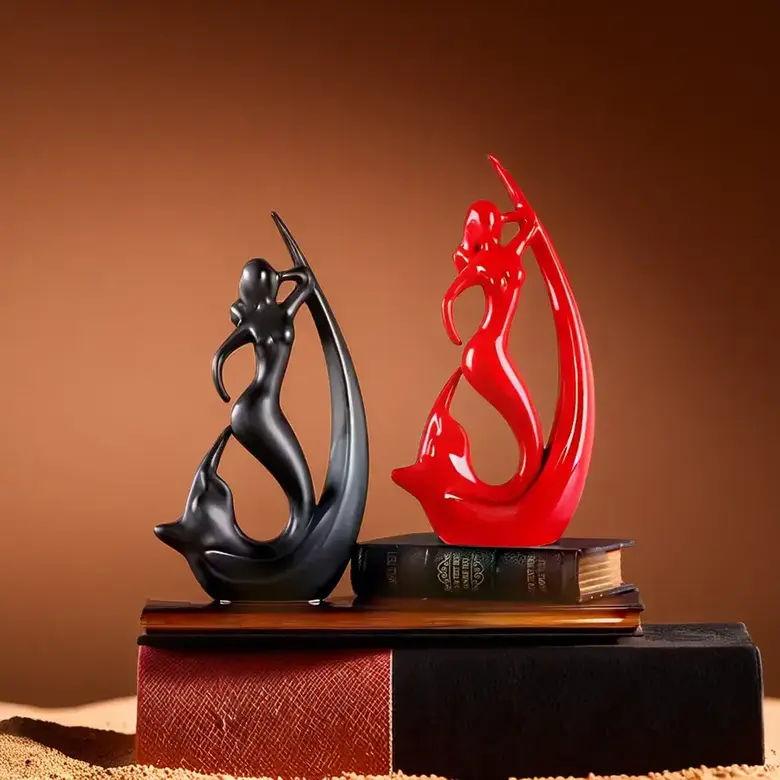
Remember those paper fortune tellers we made in elementary school? Well, they've grown up and gotten stylish! 3D geometric wall art is like origami's cooler, more sophisticated cousin. All you need is colorful cardstock paper cut into squares, some patience, and a YouTube tutorial (because let's be honest, we all need visual aids). Once you've folded your way to geometric glory, arrange these bad boys in a pattern on your wall, and voilà—instant modern art that costs less than your morning latte habit for a week! Add dimension by pairing your display with a few Modern design statues for paper wall art combinations in living room to elevate the visual appeal even further.
Kill plants faster than you can say "photosynthesis"? Paper flowers are calling your name! These gorgeous blooms bring all the beauty without the responsibility (or the bugs—bonus!). From delicate roses to statement sunflowers, paper flowers can be clustered for a dramatic focal point or spread across your wall for a garden vibe. The best part? You can match them perfectly to your decor, and they'll stay fresh forever—unlike that sad basil plant on your windowsill that's clearly plotting its escape. Consider accenting your paper floral display with Small decorative showpieces that complement paper flower walls for a layered and inviting visual touch.
Think of shadow boxes as little windows into your imagination (or evidence that you're actually a giant looking into miniature paper worlds). Create 3D scenes using layered paper cutouts inside shallow frames. A paper forest scene, a cityscape at sunset, or even an underwater adventure—the only limit is your creativity and how much coffee you've had. These little worlds add depth (literally!) to your walls and give visitors something to stare at besides their phones. You can further elevate visual charm by pairing your story boxes with Abstract showpieces that enrich paper wall shadow boxes in living rooms.
Who says mobiles are just for babies? Hanging origami creations from delicate strings creates movement and visual interest in even the dullest corners. Fold paper cranes, stars, or geometric shapes in ombré colors for a sophisticated look. As they gently twist in the breeze (or when you walk by too quickly after remembering you left the oven on), they create a mesmerizing effect that's both calming and stylish. It's like meditation for your walls! Make your mobile even more eye-catching when paired near Tall showpieces for corners to amplify origami mobile installations.
Channel your inner kindergartener with grown-up results! Cut-paper silhouettes are surprisingly dramatic when framed and hung in a group. Choose meaningful shapes—your pet, favorite city skyline, or that houseplant you're determined to keep alive this time. Contrast black paper against white backgrounds (or get wild with colors if you're feeling rebellious). It's like shadow puppets grew up and got a design degree—simple but oh-so-effective. Integrate these thoughtfully with Medium-sized modern statues to complement paper silhouette displays to give artistic symmetry to your compositions.
For those who break into a cold sweat at the thought of hammer and nails, washi tape is your wall decoration savior! This colorful Japanese paper tape sticks to walls without damaging them (landlords everywhere just breathed a sigh of relief). Create geometric patterns, fake picture frames, or even spelled-out quotes. When you inevitably change your mind next week, just peel it off and start again. It's the decorating equivalent of dating but never committing—all fun, no damage! For a more grounded flair, pair the playful patterns with Small items for decorative shelves and kitchens alongside washi tape accents.
Paper quilling is what happens when paper strips decide to embrace their curly potential. By rolling thin strips of paper and arranging them into patterns, you create intricate designs that look way more complicated than they actually are (perfect for impressing guests!). Make a statement piece with swirls and coils forming flowers, animals, or abstract designs. Fair warning: once you start quilling, you might find yourself eyeing every piece of paper as potential art material. Receipts, bills, wedding invitations—nothing is safe! Elevate your wall statement with some Resin decorative items and paper quilled art for a modern twist.
Before you gasp in bibliophile horror—we're talking about using pages from already damaged books that were destined for recycling! Frame vintage dictionary pages, old maps, or sheet music for instant sophisticated charm. Circle words that have meaning to you, or let the yellowed pages speak for themselves. It's like having a little piece of history on your wall, and it makes you look incredibly cultured without having to actually read all those classics you claimed to have finished in college. Balance this intellectual vibe with Classic artistic wall hangings styled for vintage paper page wall decor.
Create a flutter of paper butterflies that appear to be dancing across your wall! Cut different sizes from colorful paper, add a gentle center fold for dimension, and attach them so they seem to lift off the surface. Arrange them in a swirling pattern from one corner of the room to another, like they're on a migration path through your living space. Guests will wonder if they've accidentally wandered into a whimsical nature exhibit—in the best possible way! Accentuate the fantasy with Vertical Ceramic decorations to complement paper butterflies on living room walls.
If subtle isn't in your vocabulary, oversized paper flowers are your jam! Create blooms bigger than your head (which, coincidentally, is about the size most of us wish our succulent collection would grow to). Mount these dramatic flowers on your wall as a backdrop behind furniture, and you've got yourself an Instagram-worthy feature wall. Pro tip: these are perfect for covering up that mysterious stain you can't explain or the patch where your cat decided the wallpaper was her personal scratching post. Complete the visual feast with Large focal point statues to accompany oversized paper flower arrangements.
Channel your inner paper geologist and create layered mountain ranges or cityscapes using different colored paper cut in simple silhouettes. Stack them with tiny spacers in between for a 3D effect that adds depth without requiring actual construction skills. It's like having a miniature Grand Canyon on your wall—minus the tourists and gift shops. These work particularly well in minimalist spaces where you need just a touch of color and texture. For enhanced contrast and harmony, pair with Ceramic vases and sculptures beside layered paper landscapes on walls.
Who says chandeliers need to be crystal and cost more than your monthly rent? Create a showstopping pendant lamp using paper strips, honeycomb balls, or origami shapes. Hang it in a corner of your living room for a sculptural element that catches light beautifully. The soft glow through paper creates ambient lighting that's way more flattering than that overhead fluorescent that makes everyone look like they haven't slept since 2012.
Beautiful paper decor starts with quality materials—opt for cardstock, scrapbooking paper, or specialty papers rather than regular printer paper for sturdier results. Choose a technique that matches your skill level (beginners might start with simple cutouts before attempting quilling). Most importantly, plan your color scheme to complement your existing decor. Remember, precision matters—take your time with cutting and folding for professional-looking results. And don't forget: sometimes the simplest designs (like geometric shapes in coordinating colors) create the most elegant impact!
For a basic paper wall hanging: 1) Choose your design (like a circular mandala or geometric pattern). 2) Draw or print your template on cardstock. 3) Cut out your design carefully with sharp scissors or an X-acto knife. 4) Add details with smaller cut pieces, folded elements, or layers for dimension. 5) Attach a wooden dowel or stick to the top using string or glue. 6) Add hanging string or ribbon. 7) For durability, consider a light coat of clear spray sealer if the hanging won't be in direct sunlight. Voilà—wall art that looks expensive but cost less than lunch!
Transform a plain wall by thinking in terms of "zones" rather than scattered pieces. Create a gallery wall with framed paper art in different sizes but similar colors. Or make a focal point with one oversized paper installation (like a giant paper flower or geometric arrangement) centered above furniture. Consider the wall's height—use vertical arrangements in rooms with high ceilings. Don't forget about texture—mixing flat paper art with 3D elements adds visual interest. And remember the rule of thirds—place your most important elements at intersection points for balanced composition.
The secret to professional-looking wall arrangements is planning before hanging! Start by laying your pieces on the floor to experiment with layouts. For gallery walls, maintain consistent spacing (2-3 inches) between pieces. Hang art at eye level (about 57-60 inches from the floor to the center of the piece). For cohesion, choose a unifying element—similar frames, color scheme, or theme. When hanging multiple pieces, start with the center piece and work outward. And here's a pro tip: take photos of different arrangements before committing—what looks good from above might feel different on the wall!
Beyond paper wall art, transform a plain room by layering textures (add throw pillows and rugs), introducing plants (real or paper!), and ensuring proper lighting (floor lamps and table lamps create ambiance better than overhead lights). Create "conversation areas" with furniture arrangement rather than pushing everything against walls. Add personal touches that tell your story—like shadow boxes of mementos or paper art representing your interests. Finally, don't overlook the power of color psychology—even small colorful paper accents can completely change a room's energy from "blah" to "brilliant!"


